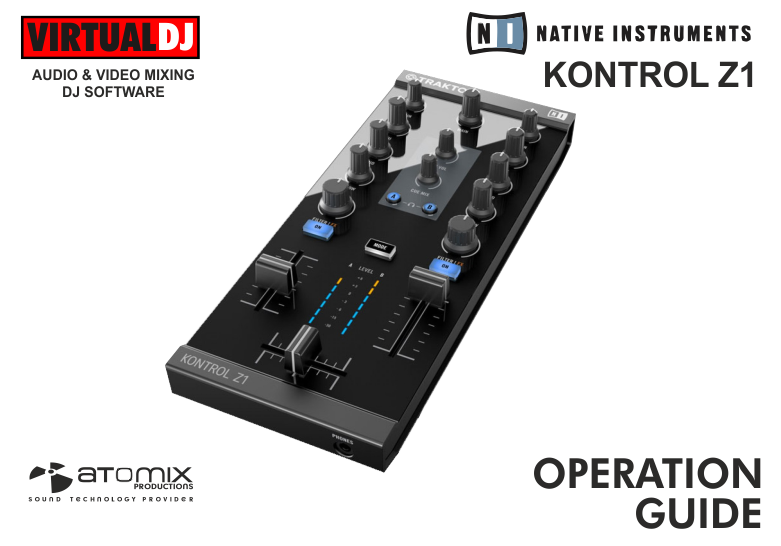
NATIVE INSTRUMENTS KONTROL Z1
INSTALLATION
Firmware: Firmware: Update the firmware of the unit to the latest version from Native Instruments
Drivers: Install the latest drivers from Native Instruments
VirtualDJ 8 Setup
(in case you have not done already)
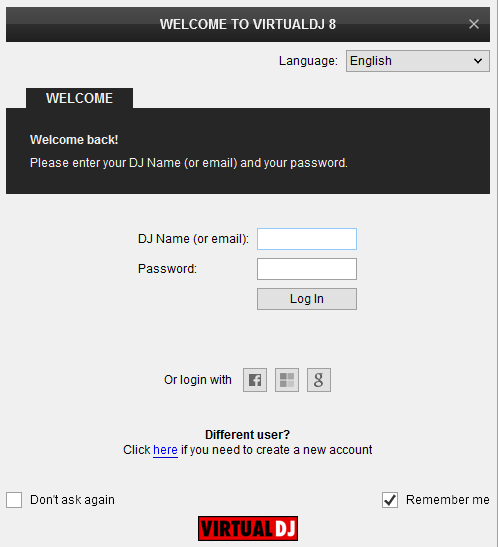
Once VirtualDJ 8 is launched, a Login Window will appear. Login with your virtualdj.com account credentials. A Pro Infinity, a Kontrol Z1 Plus or a Pro Subscription License is required to fully use the Kontrol Z1
Without any of the above Licenses, the controller will operate for 10 minutes each time you restart VirtualDJ.
Buy a license
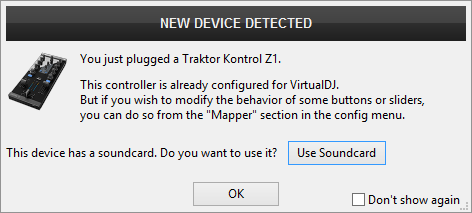
Click to OK.
Advanced Setup
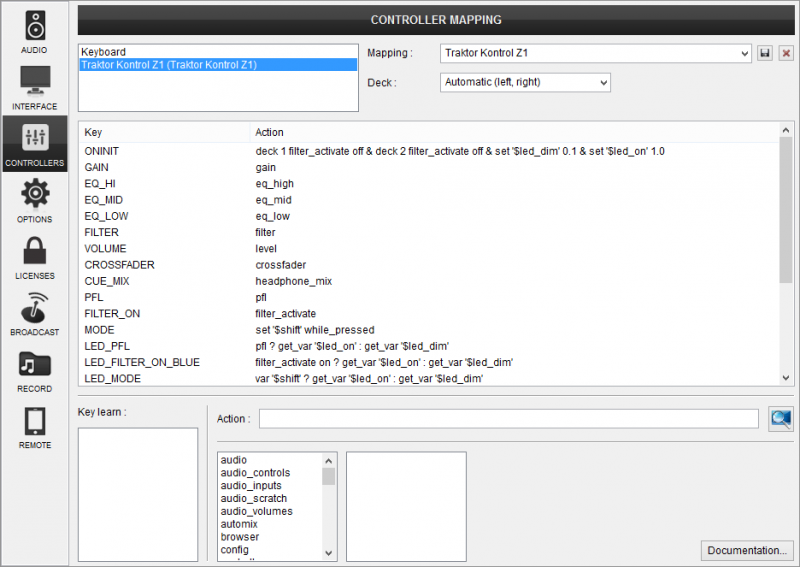
The unit should be visible in the CONTROLLERS tab of Config and the “factory default” available/selected from the Mappings drop-down list. The factory default Mapping offers the functions described in this Manual, however those can be adjusted to your needs via VDJ Script actions.
Find more details at
VDJ Pedia
The unit has a pre-defined Audio setup and a special button in the AUDIO tab of Config to provide that. Alternative Audio setups can be applied in the same window.
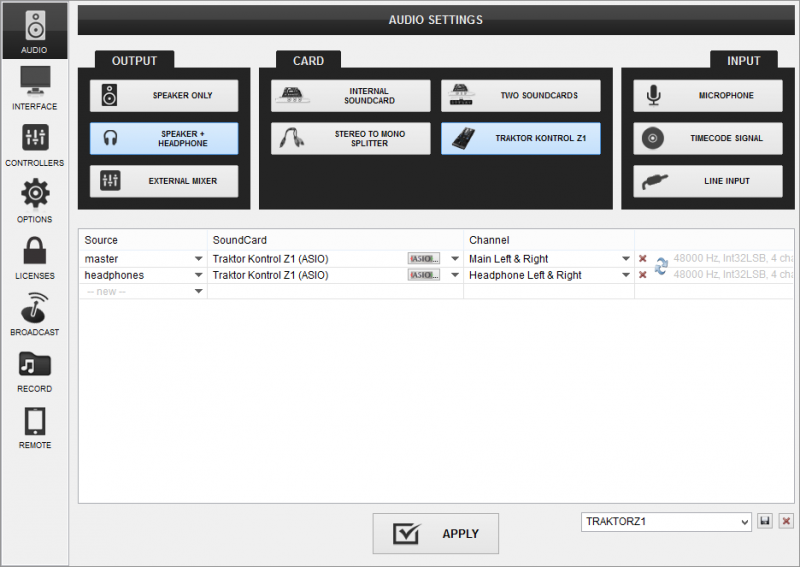
For further software settings please refer to the Manuals of VirtualDJ 8.
LAYOUT
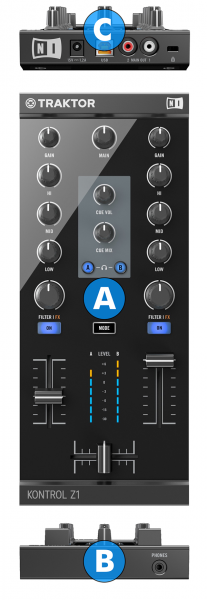
Mixer

- CROSSFADER: Blends audio between the left and right channels/decks.
- VOLUME: Adjust the output volume of each deck
- FILTER: Press this button to activate resonance filter for this channels sound
- FILTER KNOB: Turn this knob to adjust the amount of resonance filter applied on this channels sound. Middle position is off (pass through), turning left applies a low-pass filter, turning right applies a high-pass filter.
- EQ LOW: Adjusts the low (bass) frequencies of the corresponding deck.
- EQ MID: Adjusts the middle (mid) frequencies of the corresponding deck
- EQ HI: Adjusts the high (treble) frequencies of the corresponding deck.
- GAIN: Adjust the Gain (Trim) of the corresponding deck.
- MASTER VOLUME: Adjust the level of the Master Output.
- HEAPHONES VOLUME: Adjusts the Headphones (CUE) Output Volume
- HEADPHONES MIX: Adjusts the mixing between CUE and MASTER output sound output on your headphones. All the way to the left is CUE sound output only, all the way to the right is MASTER sound output only
- PFL: Press this button to send this channel's pre-fader signal to the Cue Channel for monitoring. When engaged, the button will be lit.
- MODE: Operates as a SHIFT button, allowing you to access auxiliary commands on supported buttons/knobs
- VU METER: Displays the intensity of master volume output
Front
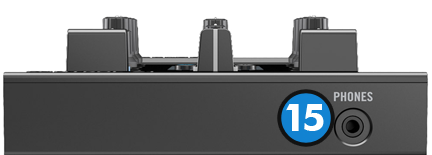
- HEADPHONES JACK: Connect your headphones
Rear
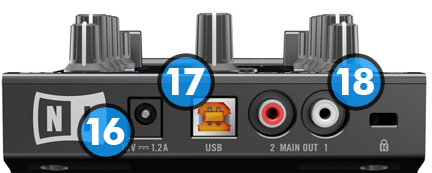
- POWER CONNECTOR: Connect the optional power supply (PSU) of the unit
- USB CONNECTOR: Connect a USB cable to establish communication between the device and your computer
- MASTER OUTPUT CONNECTORS: Use these connectors to connect your device on another mixer or an amplifier
